Anatomy Model
This is where your model and animation skeleton are setup.
Learn how to place for accurate anatomy here:
Anatomy PlacementPlacing Down The Model Node
There are five inputs for the model node
In Model - The character model you would like to create anatomy for.
Muscle Shape Model - A watertight mesh which has the shape you would like to achieve for the anatomy.
Tissue Shape Model - A watertight mesh outer shell of the body with extra volume for fat, breast tissue or anything else.
VDB SDF - A VDB with a signed distance field. This can be created inside the node and is not necessary. It is available as an alternative.
VOL SDF - A Houdini Volume with a signed distance field. This can be created inside the node and is not necessary. It is available as an alternative.
Muscle and Tissue Shapes
What the differences are between these two?
The muscle shape is specifically for where the anatomy will fit whereas the tissue shape is where the fat, breast tissue or other volumes that you would like to represent with a procedural mesh will fit to based on the outer skin.
VDB & Volumes
We use both a VDB and volume for different reasons:
VDB Used for high-rise data on the surface and inside the character
Volumes are used for outside of the character. Volumes are a little bit more wasteful so we tend to use them for lower quality outside of the character.
For the process to work you want a high resolution VDB and a low resolution volume that at the very least can describe the shape of your characters fingers.
Naming Your Character

Naming your character defines more than a way of identifying them, the name is used to create a folder and organize output files and caches that need to be organized.
It is recommended to use alpha numeric characters in the name (A-Z, 0-9, _, -). The objective of the name is to be easily readable because at later stages you will be able to work with multiple characters at a time.
$OS is a Houdini expression that returns the name of the node. So in the above instance your character would be named anatomy_model1.
Caching Your Character
The recache button saves all meshes, the VDB and volume for your character to disc as a single file.
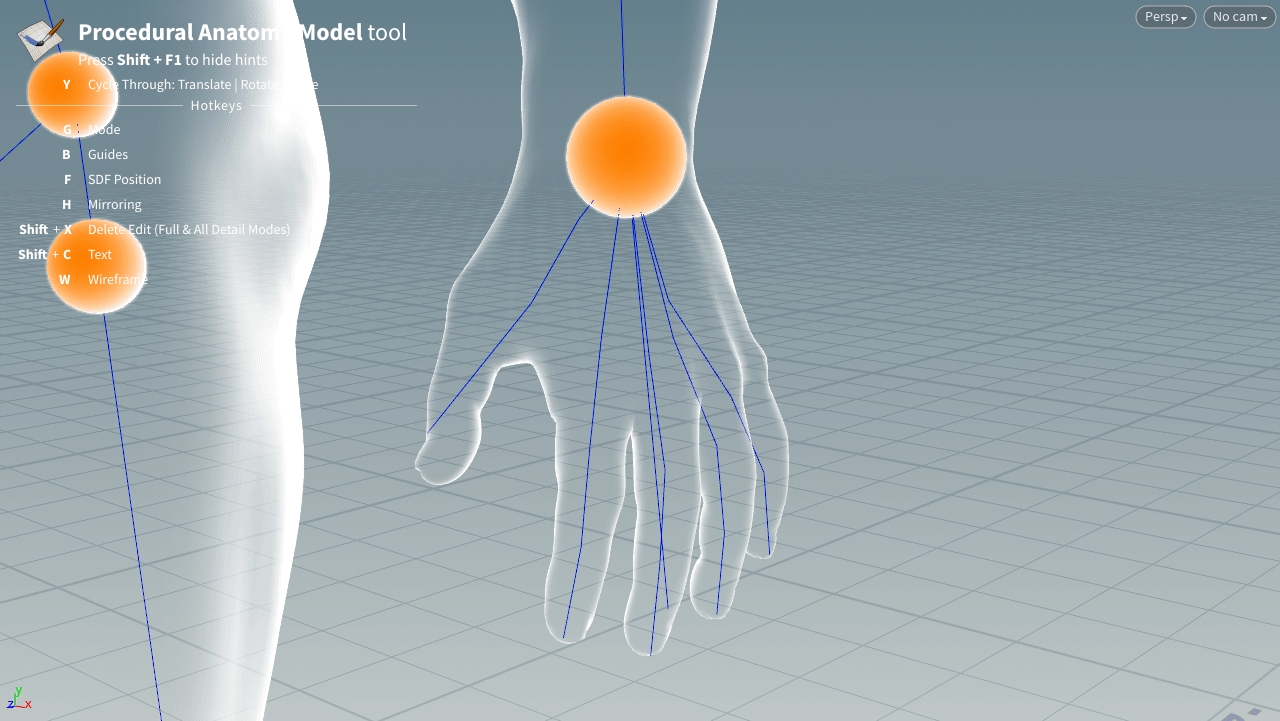
Moving Points That Represent The Animation Skeleton

Here you must enter and exit the to modify the skeleton.
Placing With Auto Positioning
Right-Click Menu
The right click menu is used for commands to make it quicker and easier to work in the viewport.
Right Click Menu vs Manipulator Right Click Menu.
Depending on where you right click you will get one menu or another. If the handle is visible and you right click you will get the handle menu which is very useful for the handle alignment options (component & world). If you click elsewhere you will get the Model node right click menu.
Mirroring
Mirroring the Simple view occurs default as +X to -X (left to right)
Mirroring can be controlled from the right click menu or in the parameters.
Mirroring the Simple view works differently from Full or All Details.
Simple mode will set the mirroring as this point is being mirrored.
Full and All Details set the mirroring as this points opposite is being mirrored.